
Match 3 – Google DeepMind Challenge Match: Lee Sedol vs AlphaGo
Googleにとっては小さな一歩だが、Technological Singularityに向けての偉大な進歩。

http://www.nature.com/nature/journal/v529/n7587/abs/nature16961.html?lang=en

Ham Radio Blog
Match 3 – Google DeepMind Challenge Match: Lee Sedol vs AlphaGo
Googleにとっては小さな一歩だが、Technological Singularityに向けての偉大な進歩。
http://www.nature.com/nature/journal/v529/n7587/abs/nature16961.html?lang=en

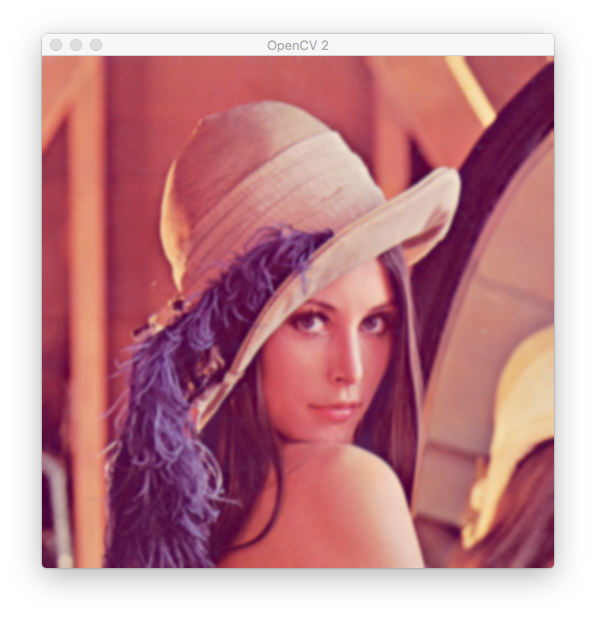
OpenCVを使えば、画像のフィルタリングは簡単です。


#include <iostream>
#include <opencv2/opencv.hpp>
using namespace cv;

int main(int argc, char** argv )
{
    Mat image;
    image = imread("/Users/user1/Desktop/lena_std.tif", 1 );
    namedWindow("OpenCV 0", WINDOW_AUTOSIZE );
    imshow("OpenCV 0", image);

    Mat gray_image;
    cvtColor(image, gray_image, CV_BGR2GRAY);
    namedWindow("OpenCV 1", WINDOW_AUTOSIZE );
    imshow("OpenCV 1", gray_image);

    Mat blur_image;
    GaussianBlur(image, blur_image, Size(7, 7), 0, 0);
    namedWindow("OpenCV 2", WINDOW_AUTOSIZE );
    imshow("OpenCV 2", blur_image);

    Mat edge_image;
    Laplacian(image, edge_image, CV_8U, 3, 1.0, 0.0, BORDER_DEFAULT);
    namedWindow("OpenCV 3", WINDOW_AUTOSIZE );
    imshow("OpenCV 3", edge_image);

    waitKey(0);

    return 0;
}

画像を扱うまた別の方法。あなたは、CMakeを用いてOpenCVをソースからビルドすることができます。
https://github.com/Itseez/opencv/archive/3.1.0.zip
% unzip opencv-3.1.0.zip
% cd opencv-3.1.0
% cmake .
% make
% sudo make install
// DisplayImage.cpp

#include <opencv2/opencv.hpp>
using namespace cv;

int main(int argc, char** argv )
{
    Mat image;
    image = imread( argv[1], 1 );
    namedWindow("OpenCV", WINDOW_AUTOSIZE );
    imshow("OpenCV", image);

    Mat gray_image;
    cvtColor(image, gray_image, CV_BGR2GRAY);
    namedWindow("OpenCV 2", WINDOW_AUTOSIZE );
    imshow("OpenCV 2", gray_image);

    waitKey(0);

    return 0;
}
% g++ -I/usr/local/include/opencv -I/usr/local/incluide/opencv2 -L/usr/local/lib -lopencv_core -lopencv_highgui -lopencv_imgproc -lopencv_imgcodecs DisplayImage.cpp

ボタン(play/pause)を2つと、スライダー(progress/volume)とを、追加しました。 Interface Builderを使うのに慣れてきたようです。
//  AppDelegate.swift

import Cocoa
import AVFoundation

var player : AVAudioPlayer?

@NSApplicationMain
class AppDelegate: NSObject, NSApplicationDelegate, NSWindowDelegate, AVAudioPlayerDelegate {

    @IBOutlet weak var window: NSWindow!
    @IBOutlet weak var myCustomView: MyView!
    @IBOutlet weak var sliderValue: NSSliderCell!
    @IBOutlet weak var volumeValue: NSSlider!

    @IBAction func playPushed(sender: AnyObject) {
        player!.play()
    }
    @IBAction func pausePushed(sender: AnyObject) {
        player!.pause()
    }
    @IBAction func sliderChanged(sender: AnyObject) {
        player!.currentTime = NSTimeInterval(sliderValue.integerValue)
    }
    @IBAction func volumeChanged(sender: AnyObject) {
        player!.volume = volumeValue.floatValue
    }

    func applicationDidFinishLaunching(aNotification: NSNotification) {
        self.window.delegate = self
        NSTimer.scheduledTimerWithTimeInterval(0.2, target: self, selector: "update", userInfo: nil, repeats: true)

        let audioPath = NSURL(fileURLWithPath: NSBundle.mainBundle().pathForResource("test", ofType: "wav")!)
        player  = try! AVAudioPlayer(contentsOfURL: audioPath, fileTypeHint: nil)
        player!.meteringEnabled = true
        player!.numberOfLoops = -1
        player!.prepareToPlay()
        player!.delegate = self
        player!.play()

        sliderValue.maxValue = Double(player!.duration)
    }

    func update() {
        sliderValue.integerValue = Int(player!.currentTime)
        myCustomView.display()
    }

}
//  MyView.swift

import Cocoa

class MyView: NSView {

    override func drawRect(dirtyRect: NSRect) {
        super.drawRect(dirtyRect)

        NSColor.grayColor().set()
        NSRectFill(self.bounds)
        let dur = player?.duration
        let cur = player?.currentTime

        if cur != nil && dur != nil {
            for var ch: Int = 0; ch < 2; ch++ {
                switch ch {
                case 0: NSColor(red: 0.8, green: 1.0, blue: 0.4, alpha: 1.0).set()
                case 1: NSColor(red: 0.2, green: 1.0, blue: 0.8, alpha: 1.0).set()
                default: break
                }
                player?.updateMeters()
                let ave = player?.averagePowerForChannel(ch)
                if ave != nil {
                    let nbar = CGFloat (600.0 * (ave! + 160.0) / 160.0)
                    let y2   = CGFloat (10 + 35 * ch)
                    let rect2 = NSMakeRect(20, y2, nbar, 30)
                    NSRectFill(rect2)
                }

                NSColor(red: 1.0, green: 0.4, blue: 0.2, alpha: 1.0).set()

                let peak = player?.peakPowerForChannel(ch)
                if peak != nil {
                    let nbar = CGFloat (600.0 * (peak! + 160.0) / 160.0)
                    let y2   = CGFloat (10 + 35 * ch)
                    let rect2 = NSMakeRect(nbar, y2, 20, 30)
                    NSRectFill(rect2)
                }
            }

            let font = NSFont.boldSystemFontOfSize(40)
            let textFontAttributes = [
                NSFontAttributeName: font,
                NSForegroundColorAttributeName: NSColor.whiteColor()
            ]

            let dd : Int = Int(dur!)
            let cc : Int = Int(cur!)
            let s:String = " duration: \(dd)sec, current: \(cc)sec"
            s.drawInRect(self.bounds, withAttributes: textFontAttributes)
        }
    }
}

AVAudioPlayerにレベルメータを付けました。Swiftで書かれていますが、最適ではありません。
//  AppDelegate.swift

import Cocoa
import AVFoundation

var player : AVAudioPlayer!

@NSApplicationMain
class AppDelegate: NSObject, NSApplicationDelegate, NSWindowDelegate, AVAudioPlayerDelegate {

    @IBOutlet weak var window: NSWindow!
    @IBOutlet weak var myCustomView: NSView!


    func applicationDidFinishLaunching(aNotification: NSNotification) {
        self.window.delegate = self
        NSTimer.scheduledTimerWithTimeInterval(0.1, target: self, selector: "update", userInfo: nil, repeats: true)

        let audioPath = NSURL(fileURLWithPath: NSBundle.mainBundle().pathForResource("test", ofType: "wav")!)
        player  = try! AVAudioPlayer(contentsOfURL: audioPath, fileTypeHint: nil)
        player.meteringEnabled = true
        player.prepareToPlay()
        player.play()
        player.delegate = self
    }

    func update() {
        myCustomView.display()
    }

}
//  MyView.swift

import Cocoa

class MyView: NSView {

    override func drawRect(dirtyRect: NSRect) {
        super.drawRect(dirtyRect)

        NSColor.grayColor().set()
        NSRectFill(self.bounds)

        let rect4 = NSMakeRect (20, 80, 600, 10)
        NSColor(red: 0.4, green: 0.4, blue: 0.8, alpha: 1.0).set();
        NSRectFill(rect4)

        let dur = player?.duration
        let cur = player?.currentTime

        if cur != nil && dur != nil {

            let y3 = CGFloat( 600.0 * cur! / dur!)
            let rect3 = NSMakeRect (20 + y3, 80,  10, 10)
            NSColor(red: 1.0, green: 1.0, blue: 0.0, alpha: 1.0).set();
            NSRectFill(rect3)

            for var ch: Int = 0; ch < 2; ch++ {
                switch ch {
                case 0: NSColor(red: 0.8, green: 1.0, blue: 0.4, alpha: 1.0).set()
                case 1: NSColor(red: 0.4, green: 0.8, blue: 1.0, alpha: 1.0).set()
                default: break
                }
                player?.updateMeters()
                let ave = player?.averagePowerForChannel(ch)
                if ave != nil {
                    let nbar = CGFloat (600.0 * (ave! + 160.0) / 160.0)
                    let y2   = CGFloat (10 + 35 * ch)
                    let rect2 = NSMakeRect(20, y2, nbar, 30)
                    NSRectFill(rect2)
                }
            }

            let font = NSFont.boldSystemFontOfSize(40)
            let textFontAttributes = [
                NSFontAttributeName: font,
                NSForegroundColorAttributeName: NSColor.whiteColor()
            ]

            let dd : Int = Int(dur!)
            let cc : Int = Int(cur!)
            let s:String = " duration: \(dd)sec, current: \(cc)sec"
            s.drawInRect(self.bounds, withAttributes: textFontAttributes)
        }
    }
}

全てをSwiftで書こうとしているところです。
// MyView.swift
import Cocoa
class MyView: NSView {
override func drawRect(dirtyRect: NSRect) {
super.drawRect(dirtyRect)
NSColor.brownColor().set()
NSRectFill(self.bounds)
let font = NSFont.boldSystemFontOfSize(70)
let textFontAttributes = [
NSFontAttributeName: font,
NSForegroundColorAttributeName: NSColor.whiteColor()
]
let now = NSDate()
let df = NSDateFormatter()
df.dateFormat = &quot;HH:mm:ss&quot;
var s = df.stringFromDate(now)
s.drawInRect(self.bounds, withAttributes: textFontAttributes)
let hhmmss: [String] = ["hh", "mm", "ss"]
for (var j: Int = 0; j<3; j++) {
df.dateFormat = hhmmss[j]
s = df.stringFromDate(now)
switch j {
case 0: NSColor(red: 1.0, green: 0.0, blue: 0.0, alpha: 1.0).set()
case 1: NSColor(red: 0.0, green: 1.0, blue: 0.0, alpha: 1.0).set()
case 2: NSColor(red: 0.0, green: 0.0, blue: 1.0, alpha: 1.0).set()
default: break
}
for (var i: Int = 0; i<Int(s); i++) {
let x = CGFloat( 20 + 10*i )
let y = CGFloat( 150 + i%10 - j*50)
let rect = NSMakeRect(x, y, 7, 40)
NSRectFill(rect)
}
}
}
}
//  AppDelegate.swift

import Cocoa

@NSApplicationMain
class AppDelegate: NSObject, NSApplicationDelegate, NSWindowDelegate {

    @IBOutlet weak var window: NSWindow!
    @IBOutlet weak var myCustomView: NSView!

    func applicationDidFinishLaunching(aNotification: NSNotification) {
        // Insert code here to initialize your application

        self.window.delegate = self
        NSTimer.scheduledTimerWithTimeInterval(1.0, target: self, selector: "update", userInfo: nil, repeats: true)
    }

    func applicationWillTerminate(aNotification: NSNotification) {
        // Insert code here to tear down your application
    }

    func update() {
        myCustomView.display()
    }
}
//
// AppDelegate.swift
//
import Cocoa
import AVFoundation
@NSApplicationMain
class AppDelegate: NSObject, NSApplicationDelegate {
@IBOutlet weak var window: NSWindow!
func applicationDidFinishLaunching(aNotification: NSNotification) {
let audioPath = NSURL(fileURLWithPath: NSBundle.mainBundle().pathForResource(&quot;test&quot;, ofType: &quot;wav&quot;)!)
let player : AVAudioPlayer
player = try! AVAudioPlayer(contentsOfURL: audioPath, fileTypeHint: nil)
player.prepareToPlay()
player.play()
}
}
私はXcode 7.2.1を使っていることに留意して下さい。第16行であなたがもしtryを使わなければ、あなたはエラー・メッセージCall can throw, but it is not marked with `try’ and the error is not handled.を受け取るでしょう。
![]()
私はエラー伝搬を止めるために、try!を使っています。


Cの関数を、Swiftから呼びます。Window by GLFWというタイトルの窓は、Cの関数mycfunc()によって生成されています。
ソースコードは、ここにあります: https://github.com/jh1ood/SwiftAndC.

どうやってGLFWを、Xcodeで使うか。

最初に、いくつかのフレームワークを追加します。

それから、ヘッダーファイルとライブラリのサーチパスを。

最後に、リンカー・フラッグです。
これはGLFWバージョンです。これであれば、”deprecated”という警告が出ないので、ずっと気分が良いです。

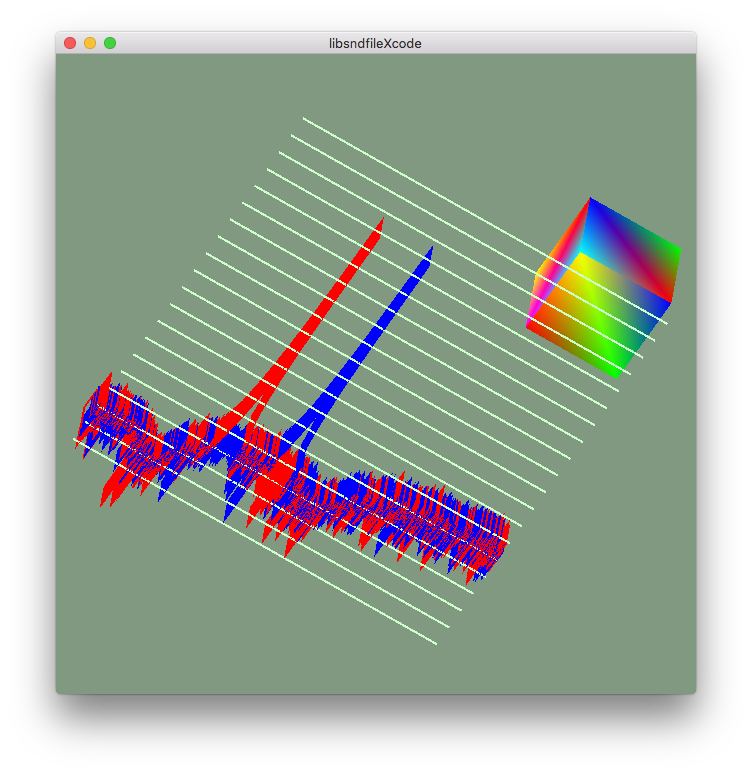
ソースコードは、ここにあります:https://github.com/jh1ood/libsndfileGlfwXcode